March 3, 2025
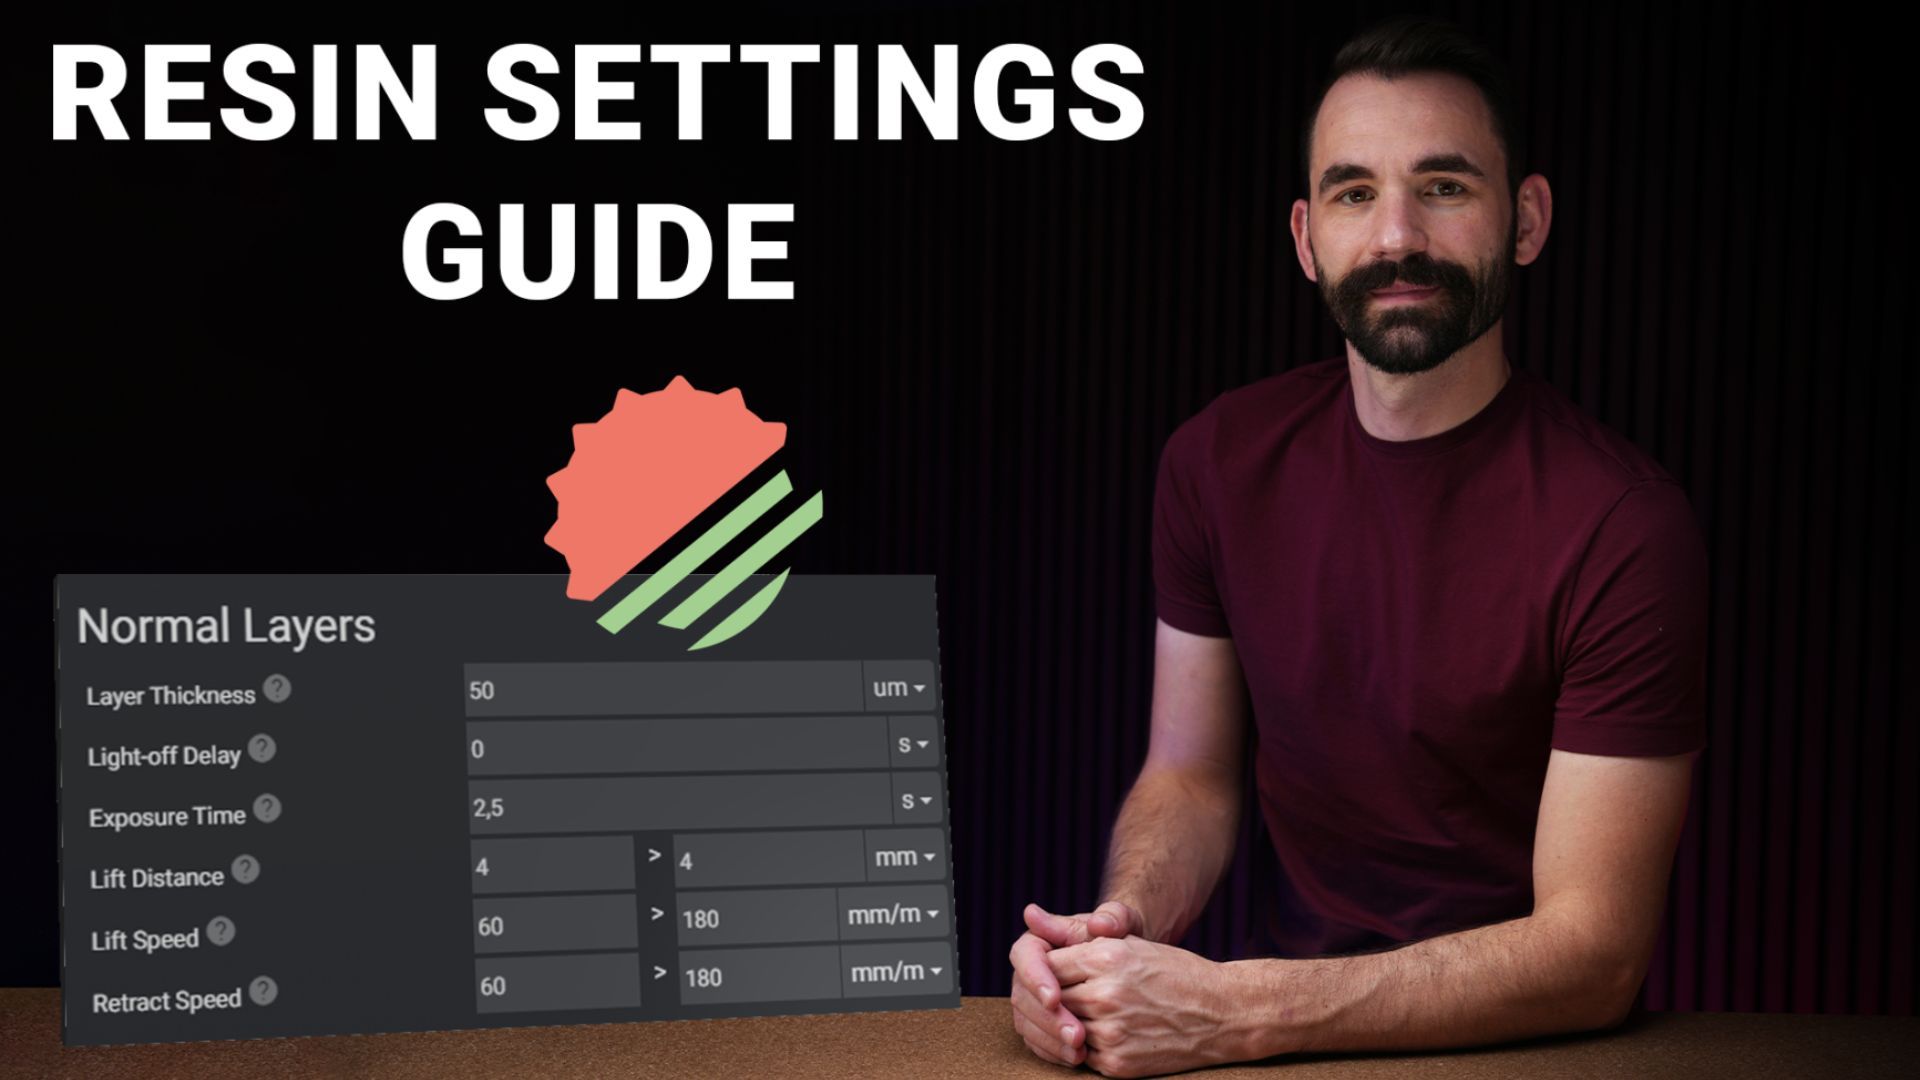
The best resin settings for your printer - Lychee Slicer Guide
Tips
When you print, you're chasing that perfect result. Achieving high-quality 3D prints requires precise resin settings. Thanks to Lychee Slicer, you can fine-tune them to optimize your printer's performance helping you balance speed, detail, and reliability. Let’s dive into the essential resin parameters, our top recommendations, and additional tips that will make all the difference and help you step by step find the perfect settings.
For a visual walkthrough, our 3D printing expert Derek guide you through this topic in a complete YouTube video: The best resin settings for your printer | Lychee Slicer Tutorial
Two Types of Resin Setting Systems: Chitu Systems vs. Anycubic
Before diving into resin settings, it's crucial to identify your printer's motherboard system. This is usually determined by your printer's brand.
- Anycubic Motherboard: Anycubic printers use their own proprietary system.
- Chitu System Motherboard: Most other resin printer brands (Elegoo, Uniformation, Phrozen, etc.) likely uses the Chitu system.
While many settings are similar across both systems, some differences exist. Here are two examples:
- Retract Speed setting: On Anycubic systems, you set a single retract speed, which applies from the apex of the cycle down to the bottom. While the printer may make minor automatic adjustments, the user has no control over these. Chitu systems, on the other hand, allow for more granular control by setting retract speed in two stages. You can configure a faster speed at the apex and, if desired, a slower speed as the build plate approaches the LCD.
- Light-Off Delay/Wait Before Print settings: These settings control the pause after the light turns off and before the build plate moves, ensuring consistent layer thickness. Chitu-based printers have three wait time settings:
- Wait Before Print – This is the most critical setting, directly affecting layer consistency.
- Wait After Print – Its impact is debatable, potentially just adding time to the process.
- Wait After Lift – Similar to "Wait After Print," its necessity is uncertain.
Anycubic systems use a single setting: Light-Off Delay – This functions identically to "Wait Before Print" on Chitu systems. For optimal results, never set this below 2 seconds on either system. For 13" or larger printers or when using very thick resin, consider increasing it to 3–4 seconds to ensure consistent curing and layer adhesion.
‘Global Parameters’ Settings on Lychee Slicer

Two Stage Motion control (TSMC) - on/off
TSMC optimizes the lift process by using two speeds: a slow lift for reliable FEP release and a faster lift to reduce print time, balancing quality and efficiency. Avoid excessive lifting, as exiting the resin too quickly can cause failures.
Light off Delay (on) / Resting Time (off) - on/off
Important: On Chitu Systems, enabling both TSMC and "Light Off Delay" can trigger a firmware bug, preventing proper functionality.
‘Burn-in-layer’ Settings on Lychee Slicer
Note: Think of burn-in layers as the glue that holds your 3D print to the build plate. They're the very first layers printed, and they need special attention. Getting these settings right in Lychee Slicer is essential for a successful print. If this part fails, your entire print will fail.
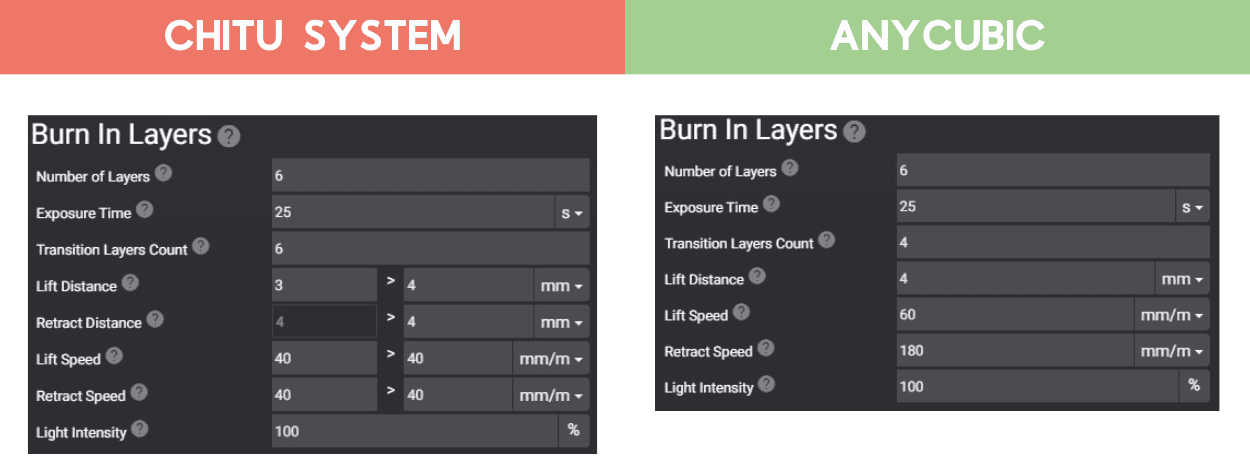
- Number of Layers: This setting controls how many layers are "burn-in" layers. Tip: A few (around 4) are typically sufficient. Don't go overboard, as too many burn-in layers can make the print difficult to remove from the build plate and cause damage.
- Exposure time: This is how long the UV light cures the "burn-in" layers. Burn-in layers need more exposure than normal layers for good adhesion to the build plate.
Tip: Start with your resin manufacturer's recommended exposure time. Every resin is different, so calibrate for each resin, printer, and layer height. Go up or down by 4 seconds until it comes off easily but still holds firm. Develop a different burn-in exposure time for each size of print. Example for a fast resin like Navy Gray: Small (calibration prints, small parts): 15-24 seconds Medium (minis, parts of larger prints): 27-34 seconds Large (terrain, large statues): 35-40 seconds
- Transition Layers: These layers create a smooth change between the long exposure of burn-in layers and the shorter exposure of normal layers. They help "glue" everything together.
Tip: A gradual transition is key; jumping straight from a long burn-in exposure (e.g., 24s) to a short normal exposure (e.g., 1.1s) can cause problems.
- Lift Distance: This setting controls how far the build plate lifts away from the FEP after each layer is printed. This is where Two-Stage Motion Control (TSMC) comes in.
Tip: Set this to 25% higher for burn-in layers than for normal layers. A common setup is 4mm for the initial lift (at a slower speed) and then an additional amount (e.g., another 4mm, for a total of 8mm) at a faster speed. For larger printers (like the M7 Max or GK3 Ultra), consider adding an extra 2mm (e.g., 4mm + 6mm).
- Lift Speed: This setting controls how fast the build plate lifts.
Tip: Lift speed should be slow for burn-in layers, as they are very difficult to remove from the FEP (no greater than 40mm/m). Never use a lift speed faster than 100mm/m for burn-in layers—there's no benefit, and it could cause problems.
- Light Off Delay: This setting controls a short pause before the UV light cures the resin. It allows the printer to return to its starting position, gives the resin time to settle to the desired thickness, and helps minimize resin flow.
Tip: Your printer might not have a separate Light Off Delay setting specifically for burn-in layers. If it doesn’t, keeping it at 1 second is a good default.
Important Note: Even after the motor stops running, the printer may continue to move slightly for a few seconds due to mechanical pressures.
- Retract Speed: This setting controls how fast the build plate moves down after lifting.
Tip: Burn-in layers create significant pressure against the LCD during retraction. A slow retract speed minimizes stress on your printer, preventing the frame and arm from flexing or bending.
‘Normal Layers’ Settings on Lychee Slicer
These are all the layers printed after the burn-in layers. Once you've configured your burn-in layer settings, you'll then adjust the settings for these normal layers.
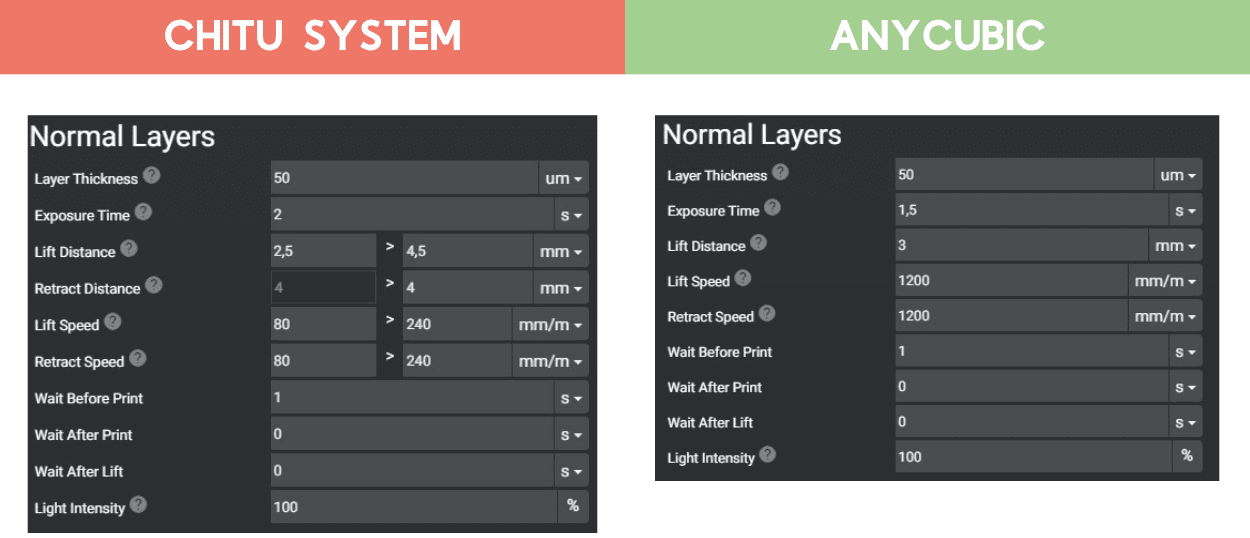
- Layer Thickness: This setting determines the thickness of each individual layer of your print.
Tip: Don't go below 0.03mm, as the resin may not properly fill such thin layers, potentially causing damage. 0.05mm is a commonly used value that provides high print quality.
- Light-Off Delay (Anycubic) / Wait Before Print (Chitu Systems): This setting pauses the printer after the build plate moves down, allowing the resin to settle before curing the next layer.
Tip Anycubic (Light-Off Delay): Start with 2 seconds for most resins on 10-inch printers; increase to 3 seconds for thicker resins. Tip Chitu Systems (Wait Before Print): Ensures stability before curing—similar function, different name.
- Exposure time: This setting determines how long the UV light cures each layer. Thinner layers (cf. Layer Thickness) generally requires less exposure time.
Tip: This setting needs to be calibrated for each resin and printer. While many resins use around 1.8 seconds, it's essential to consult your resin's specifications and fine-tune as needed.
- Lift Distance: This setting determines how far the build plate lifts after each layer is cured. It’s similar to the burn-in layer lift distance but applies to all normal layers.
Tip: Avoid lifting too high on normal layers, as they haven’t been exposed as long and don’t stick as much as burn-in layers. Instead of lifting 4mm, consider using a combined lift distance like 4mm up + 4mm down (total 8mm) or 3mm up + 3mm down (total 6mm). A 3mm lift alone may not fully release the layers, potentially leading to print failures. Adjusting this setting can also help optimize print speed.
- Retract Distance (Chitu systems only): This setting controls when the slower retract speed kicks in as the build plate moves downward.
Tip: A common approach is to use the faster retract speed for most of the travel and then switch to the slower speed for the final portion (e.g., the last 2mm) to ensure a smooth and safe return to the FEP. I typically set this to 2mm.
- Lift Speed: This setting controls how fast the build plate lifts for normal layers. Just like with burn-in layers, it uses a two-stage approach (slower for the initial lift, faster for the rest).
Tip: A first-stage lift speed of 45mm/minute is generally a safe starting point. With experience, you can increase this, but keep it below 60mm/minute to avoid issues. For the second stage (after the initial lift), speeds around 250mm/minute are common.
- Retract Speed: This setting controls how fast the build plate moves down after lifting, but for all the normal layers (not just the burn-in layers).
Tip: While there's a general speed limit (around 200 mm/m is a safe green zone, 200-250 mm/m is a cautionary yellow zone, and above 250 mm/m is the red zone), the best way to find the optimal retract speed is through testing. However, for the second stage of retraction, when the build plate nears the FEP film, it's crucial to slow down (though not as much as with burn-in layers). A good starting point is 60 mm/m; going faster than 100 mm/m can increase the risk of issues like warping.
- Wait After Lift (Chitu Systems Only): This setting adds a pause at the top of the lift motion before the build plate starts retracting (moving down).
Tip: There's usually no need to adjust this; you can keep it at zero.
- Light Intensity (some Chitu systems): This setting allows you to adjust the strength of your UV light.
Tip: If you have a resin that cures very quickly (like a "fast resin"), reducing the light intensity can give you more control over the exposure time.
Print Time Override
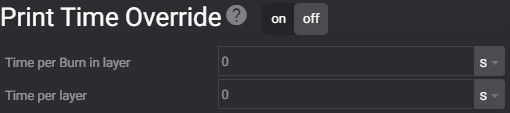
This feature helps you fine-tune print time estimates, as real-world print times often differ from the initial estimate. This discrepancy occurs because printers don't always move at the exact speeds specified in the profile.
Tip: To improve accuracy, time your burn-in layers and normal layers with a stopwatch. Calculate the average time per burn-in layer and the total time for a full normal layer (lifting, curing, retracting). Inputting these values will make your print time estimates more precise.
By now, you should have a solid grasp of how to fine-tune your resin settings in Lychee Slicer for optimal print quality, speed, and reliability. Remember, the key is to understand the different parameters, start with recommended values, and then calibrate based on your specific printer, resin, and desired results.